Basically the goal is To create a web application that run on VMWare using Python/Django with MySql, and able to accessed by the host OS.

Note: This is tested on Ubuntu Server 12.04 LTS, the host OS is Mac OS X mountain lion.

Configure your guess OS which the web server is to be run later

Assumed that the instance is clean (which doesn’t install anything other than the OS)

Install all the necessary package

1
$ sudo apt-get install python-pip mysql-server python-mysqldb nginx
  • python-pip is to install Django and flup
  • mysql-server & python-mysqldb is required to run Django with MySql
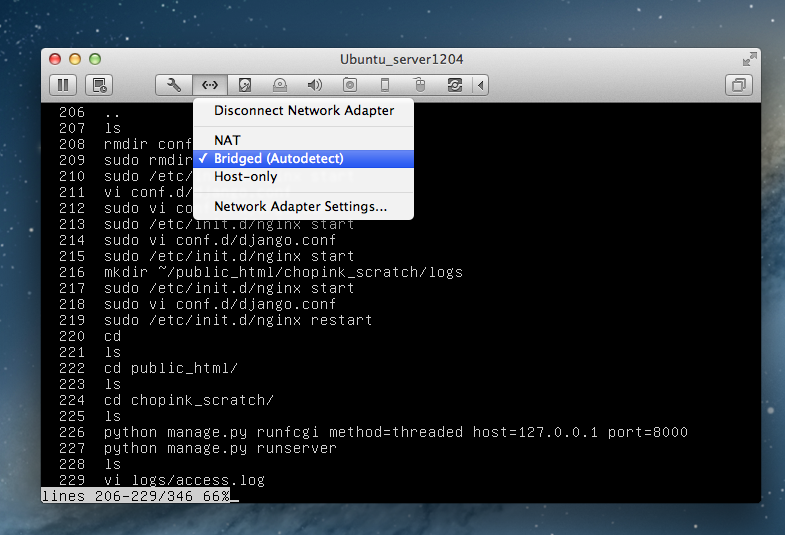
  • nginx is a reverse proxy server that used to redirect the HTTP Request from port 80 (default port) to port 8000 (Django default port, you can change to any port number)

Now install Django and flup

1
2
$ pip install Django==1.5.1
$ pip install flup

Create a user for database

1
2
3
4
5
6
7
8
9
10
11
12
13
14
15
16
17
18
19
20
$ mysql -u root -p
Enter password:
Welcome to the MySQL monitor. Commands end with ; or \g.
Your MySQL connection id is 1
Server version: 5.5.29-0ubuntu0.12.04.2 (Ubuntu)

Copyright (c) 2000, 2012, Oracle and/or its affilliates. All rights reserved.

Oracle is a registered trademark of Oracle Corporation and/or its
affilliates. Other names may be trademarks of their respective owners.

Type 'help;' or '\h' for help. Type '\c' to clear the current input statement.

root@localhost [(none)]> CREATE DATABASE django_db;
Query OK, 1 row affected (0.01 sec)

root@localhost [(none)]> GRANT ALL ON django_db.* TO 'username'@'localhost' IDENTIFIED BY 'password'
Query OK, 0 row affected (0.03 sec)

root@localhost [(none)]> exit

This basically is create a new database django_db and a new user username with password password. And grant all permissions to username on django_db.

Start a new project

1
2
3
$ mkdir ~/public_html # This is optional
$ cd ~/public_html
$ django-admin.py startproject projectname

Edit the file ~/public_html/projectname/projectname/settings.py

1
2
3
4
5
6
7
8
9
10
DATABASES = {
'default': {
'ENGINE': 'django.db.backends.mysql',
'NAME': 'django_db',
'USER': 'username',
'PASSWORD': 'password',
'HOST': '',
'PORT': '',
}
}

Create an app to this project

1
2
$ cd ~/public_html/projectname/
$ python manage.py startapp newapp

Edit the file ~/public_html/projectname/newapp/models.py

1
2
3
4
5
6
7
from django.db import models

class User(models.Model):
id = models.AutoField(primary_key=True)
first_name = models.CharField(max_length=30)
last_name = models.CharField(max_length=30)
created_date = models.DateTimeField()
1
2
3
4
5
6
7
8
9
10
11
$ python manage.py sql newapp
BEGIN;
CREATE TABLE `newapp_user` (
`id` integer AUTO_INCREMENT NOT NULL PRIMARY KEY,
`first_name` varchar(30) NOT NULL,
`last_name` varchar(30) NOT NULL,
`created_date` datetime NOT NULL,
)
;

COMMIT;

This is just a preview without actually create a table on your database.
Thus, you have to run this

1
$ python manage.py syncdb

To verify it

1
2
3
4
5
6
7
8
9
10
11
12
13
14
15
16
17
18
19
20
21
22
23
24
25
$ mysql -u root -p django_db
Enter password:
Welcome to the MySQL monitor. Commands end with ; or \g.
Your MySQL connection id is 1
Server version: 5.5.29-0ubuntu0.12.04.2 (Ubuntu)

Copyright (c) 2000, 2012, Oracle and/or its affilliates. All rights reserved.

Oracle is a registered trademark of Oracle Corporation and/or its
affilliates. Other names may be trademarks of their respective owners.

Type 'help;' or '\h' for help. Type '\c' to clear the current input statement.

root@localhost [(django_db)]> desc newapp_user;
+--------------+-------------+------+-----+---------+----------------+
| Field | Type | Null | Key | Default | Extra |
+--------------+-------------+------+-----+---------+----------------+
| id | int(11) | NO | PRI | NULL | auto_increment |
| first_name | varchar(30) | NO | | NULL | |
| last_name | varchar(30) | NO | | NULL | |
| created_date | datetime | NO | | NULL | |
+--------------+-------------+------+-----+---------+----------------+
4 rows in set (0.00 sec)

root@localhost [(none)]> exit

Now configure Nginx to the django project

1
$ sudo vi /etc/nginx/sites-available/django.conf # create a new file

with this content

1
2
3
4
5
6
7
8
9
10
11
12
13
14
15
16
17
18
19
20
21
22
23
24
25
server {
listen 80;
server_name test.local.domain;
access_log /home/username/public_html/projectname/logs/access.log;
error_log /home/username/public_html/projectname/logs/error.log;

location /static/ {
alias /home/username/public_html/projectname/static/;
expires 30d;
}

location /media/ {
alias /home/username/public_html/projectname/media/;
expires 30d;
}

location / {
fastcgi_pass 127.0.0.1:8000;
fastcgi_split_path_info ^()(.*)$;
include /etc/nginx/fastcgi_params;
fastcgi_param PATH_INFO $fastcgi_script_name;
fastcgi_pass_header Authorization;
fastcgi_intercept_errors off;
}
}

Remember to create a logs directory in ~/public_html/projectname/

1
$ mkdir ~/public_html/projectname/logs

Start your Nginx server

1
$ sudo /etc/init.d/nginx start

Run your project on Nginx

1
2
$ cd ~/public_html/projectname
$ python manage.py runfcgi method=threaded host=127.0.0.1 port=8000

Now your server is run on background.

Go back to your host OS

Configure your network setting for the instance that run the web application

Network setting

NOTE: This must be in LAN environment, so that the router assign a new ip for your guess OS

To get your Guess OS’s ip, have to go back to guess OS

1
2
3
$ ifconfig
eth0 Link encap:Ethernet HWaddr 00:11:22:33:44:55
inet addr:192.168.1.123 Bcast:.......

Here you want is 192.168.1.123

Now configure your host OS

Add a host (local domain)

1
$ sudo vi /etc/hosts

add a new line to the bottom

1
192.168.1.123    local.mysite.com

You can just put whatever name you want.

Open up your favourite browser and type in the URL
local.mysite.com and you should be able to see the page below

Welcome page

Enjoy :)

References: