Use custom font in iOS application
There are few steps to add custom font in your Xcode project.
Step 1: Add UIAppFonts to your Info.plist
1 | <key>UIAppFonts</key> |
You must add this before you can use the font
Step 2: Drag your font into Resources folder
- Make sure you check Copy items into destination group’s folder (if needed)
- Select Create groups for any added folders
- Check Add to targets for your project
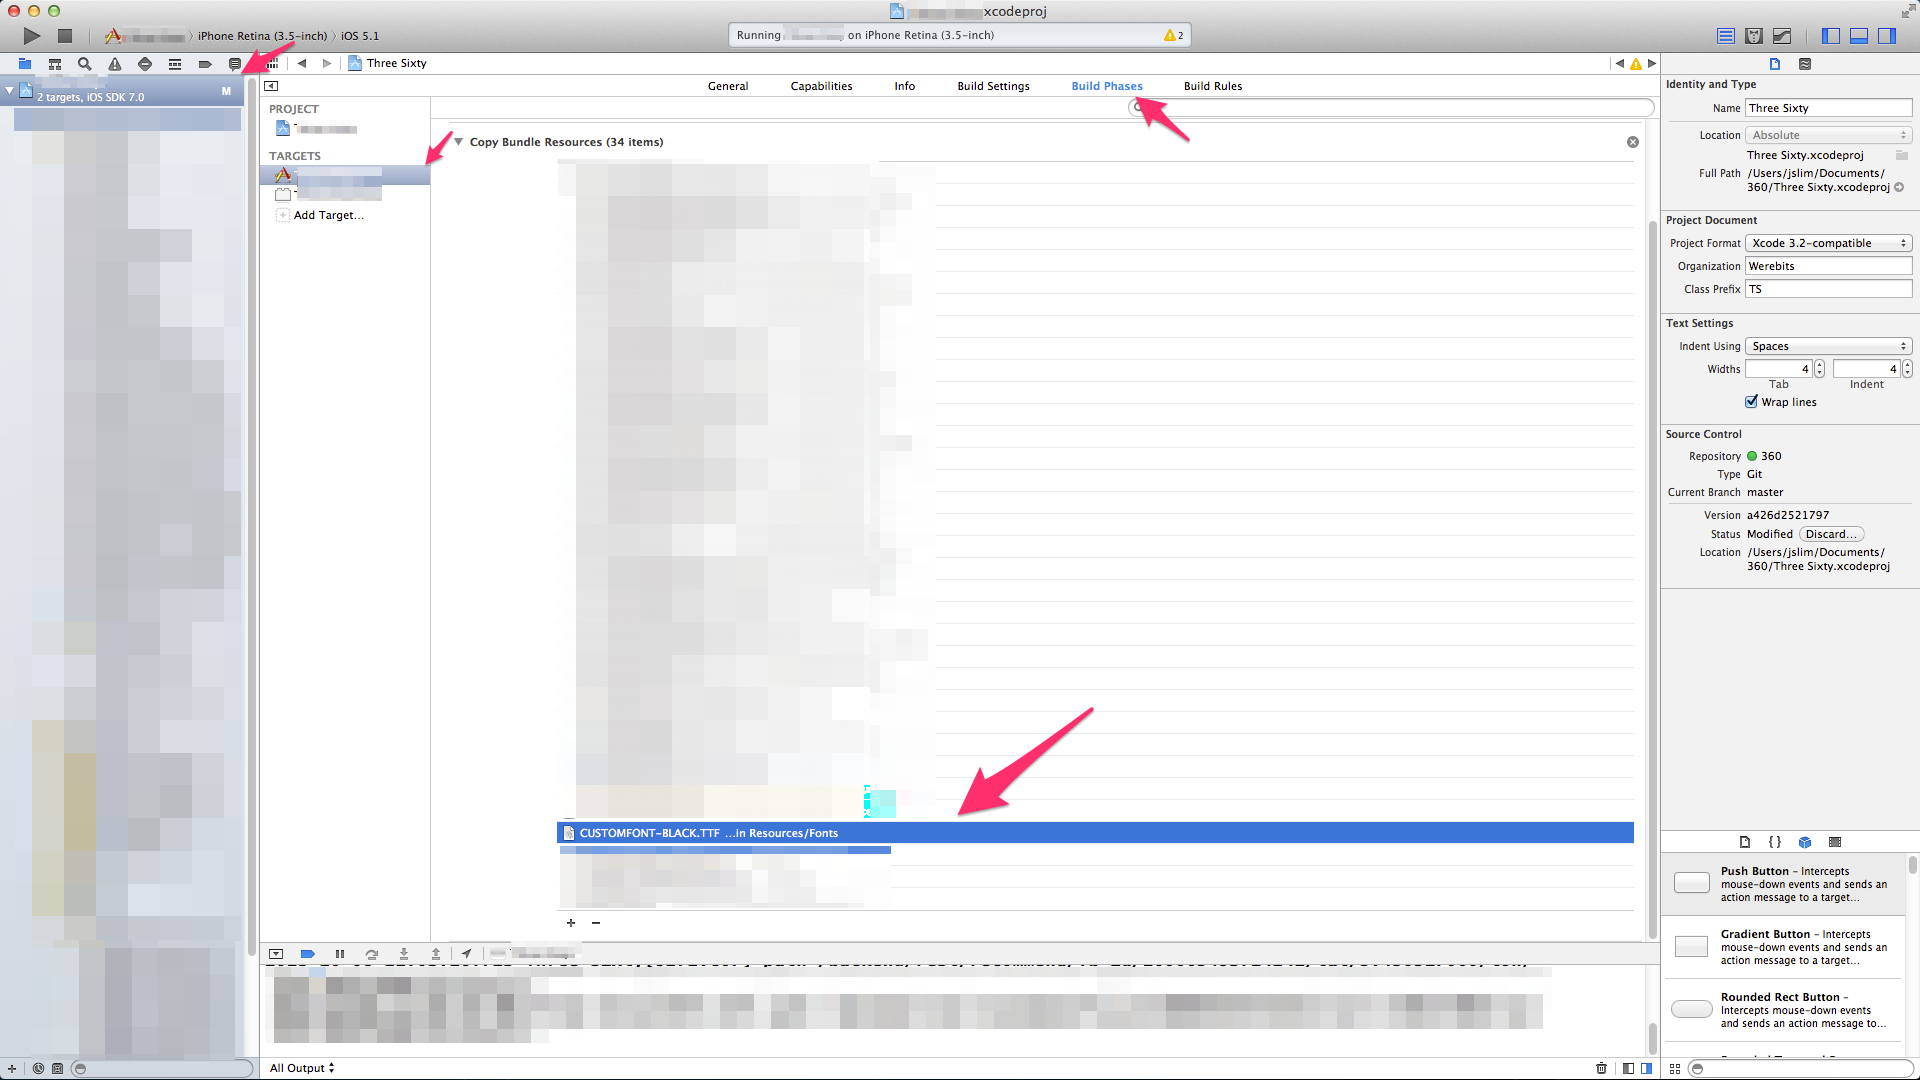
Step 3: Verify is your font now in Bundle resources
Go to Project -> Targets and select your project. In Build Phases tab, look for Copy Bundle Resources and make sure the font is there.
Step 4: Print out all available font
1 | for (NSString *familyName in [UIFont familyNames]) { |
And make sure your font is there
Step 5: Start using your font
1 | myLabel.font = [UIFont fontWithName:@"CustomFont-Black" size:50]; |
NOTE: If it doesn’t work, repeat Step 2 again. Some time it may not work
References: